
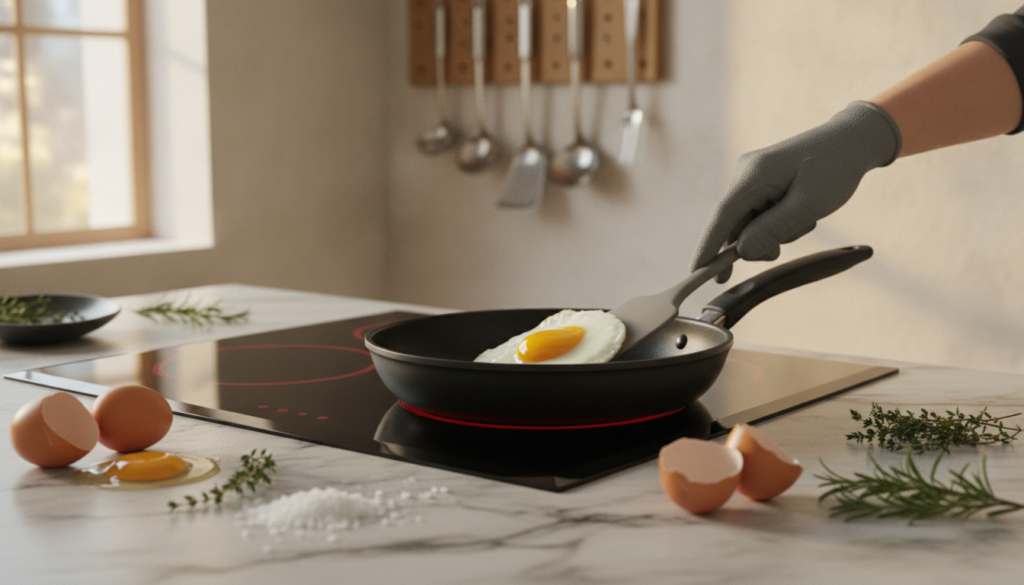
Welcome to my kitchen, where breakfast happens almost every single morning.
Few foods show up on my stove as often as this humble breakfast staple. I’ve cracked more shells than I can count, and I’ve learned plenty of lessons the hard way.
Rubbery scrambled curds, cracked shells during a rolling boil, yolks with that unappetizing green ring—I’ve experienced it all firsthand.
That frustration is exactly why I put together this guide. I wanted a resource that felt like a conversation with a friend, not a dry culinary textbook.
Inside, you’ll find my honest walkthrough for scrambled, boiled, fried, and poached preparations, plus a reliable omelet technique. I’ll also flag the pitfalls I notice most often, so you can sidestep them with confidence.

My approach stays simple and encouraging. With a few small adjustments to your technique, you can transform your morning routine and get a breakfast staple that turns out right, every single time.
Key Takeaways
- Small technique adjustments make a big difference in texture and flavor.
- Scrambled, boiled, fried, poached, and omelet methods each need their own approach.
- Cracked shells and rubbery curds are avoidable with the right heat control.
- A green ring around the yolk signals overcooking, not spoilage.
- Fresh ingredients and proper timing matter more than fancy equipment.
- Practice and patience turn breakfast into a reliable morning ritual.
Why Egg Cooking Temperatures Matter More Than You Think
Watching my scrambled eggs turn bad in a minute was a wake-up call. It wasn’t about the ingredients or my whisking. It was all about egg cooking temperatures.
Eggs are mostly protein and water. Heat makes the proteins bond, a process called coagulation. Gentle heat lets them bond slowly.
This slow bonding traps moisture inside. That’s why you get soft, custardy eggs.
But, high heat changes everything. Proteins bond too fast, squeezing out moisture. This makes eggs dry and tough.
I learned this the hard way. My stove was hotter than I thought, and I was cooking on what I thought was medium heat. My eggs turned stiff and chalky in seconds. I couldn’t understand why my eggs didn’t look like the ones in videos until I checked my burner setting.
“Eggs are one of the most temperature-sensitive foods you’ll ever cook. A few extra degrees can mean the difference between silky and rubbery.”
— Harold McGee, food science author
This quote is what I learned in my kitchen. Eggs don’t need high heat to cook well. They need patience and a steady, moderate temperature.
Here’s how different heat levels affect eggs, based on my experience:
| Heat Level | Effect on Egg Proteins | Resulting Texture |
|---|---|---|
| Low (below 160°F) | Proteins bond slowly and gently | Soft, creamy, custard-like |
| Medium (160–180°F) | Proteins bond at a moderate pace | Firm but tender |
| High (above 180°F) | Proteins bond too fast and squeeze out moisture | Tough, dry, rubbery |

Understanding this changed my egg cooking. I stopped rushing and started watching the pan. Every egg technique I share later is about managing egg cooking temperatures with care. Respect the heat, and the eggs will always be great.
Essential Tools and Ingredients I Always Use for Cooking Eggs
I used to think any pan would do until I ruined my third batch of scrambled eggs. That morning taught me a hard lesson. The right tools and ingredients make all the difference.
These cooking tips aren’t complicated or expensive. They’re simple habits that took me years to figure out. I’m happy to save you the guesswork.
Must-Have Kitchen Tools for Egg Success
My nonstick pan is the MVP of my kitchen. A quality nonstick or well-seasoned cast iron skillet prevents sticking and gives even heat.
A silicone spatula comes next on my list. Metal spatulas scratch nonstick coatings and can tear delicate egg curds. Silicone glides smoothly and flexes just enough to fold eggs gently.
I also keep a reliable kitchen timer within arm’s reach. Eggs go from perfect to overcooked in a matter of seconds. I don’t trust my instincts alone anymore—I trust the clock instead.
For poaching, a fine-mesh strainer has become essential to my egg preparation methods. Straining the egg through the mesh removes the loose, watery whites. This leaves a clean, compact egg that holds its shape.

Choosing the Right Eggs and Fats
Freshness changes everything about how an egg behaves in the pan. Fresh eggs hold their shape better when poached or fried. Older eggs spread thin and lose structure.
I check the carton date every time I shop. I try to use eggs within two weeks of purchase for the best texture. Large eggs are my go-to size, as most recipes are built around that standard measurement.
The fat I choose changes the flavor and texture of my eggs just as much as the cooking method does. Butter gives scrambled eggs a rich, silky finish, but it burns quickly if my pan runs too hot.
Ghee has become my favorite for high-heat cooking because it keeps that buttery flavor without the risk of burning. Neutral oils like avocado or canola work well when I want a cleaner taste that doesn’t compete with other ingredients.
Here’s a quick breakdown of how I choose my fat based on the dish:
| Fat Type | Smoke Point | Flavor | Best For |
|---|---|---|---|
| Butter | Low (around 300°F) | Rich, creamy | Scrambled eggs, omelets |
| Ghee | High (around 485°F) | Nutty, buttery | Fried eggs, high-heat cooking |
| Olive Oil | Medium (around 375°F) | Fruity, robust | Sunny-side up, sautéing |
| Avocado Oil | High (around 520°F) | Neutral, mild | Any high-heat egg preparation methods |
Julia Child said it best when it comes to keeping things simple in the kitchen.
“You don’t have to cook fancy or complicated masterpieces – just good food from fresh ingredients.”
Julia Child
That philosophy guides my whole approach to eggs. Good tools and quality ingredients don’t need to be fancy. They just need to work well together, every single time I step into the kitchen.
How to Cook Eggs Perfectly: My Step-by-Step Method for Perfect Scrambled Eggs
I used to make bad scrambled eggs for years. They were dry, pale, and looked sad. Now, I make perfect scrambled eggs almost every time. It’s easier than you think.
This method has three parts: whisking and seasoning, cooking, and knowing when to stop. If you miss any step, your eggs will be bad. But if you follow all three, you’ll make amazing eggs.
Step 1: Whisking and Seasoning Basics
I whisk my eggs for 30 to 45 seconds until they’re pale yellow and frothy. This step is key for fluffy eggs.
I salt my eggs before cooking, not after. Some say this makes eggs watery, but it actually makes them softer.
I don’t add milk or cream. They dilute the egg flavor and make the eggs less silky. For creaminess, add cold butter to the eggs instead.
- Whisk time: 30–45 seconds, until pale and slightly frothy
- Salt: Add before cooking for better texture
- Dairy: Optional, but I recommend skipping it
- Butter: A small pat mixed into raw eggs boosts creaminess
Step 2: Low and Slow Cooking Method
This step makes great scrambled eggs. I melt butter in a nonstick pan over low heat. Being patient is key.
After the butter foams, I pour in the eggs and let them sit for 10 seconds. Then, I stir constantly with a spatula to move the curds.
Low and slow isn’t a suggestion—it’s the whole secret.
I keep the pan moving, sometimes lifting it off the heat. This prevents overcooking. It takes about four to six minutes, but it’s worth it.
Step 3: Knowing When to Pull Them Off the Heat
Eggs keep cooking after you take them off the stove. I pull my pan off when the eggs look slightly underdone.
I look for curds that are soft, glossy, and just set. They should look a little wet. That’s when they’re ready.
| Stage | Appearance | What To Do |
|---|---|---|
| Underdone | Runny, translucent, mostly liquid | Keep stirring over low heat |
| Perfect | Glossy, soft curds, slightly wet look | Remove from heat immediately |
| Overcooked | Dry, chalky, rubbery texture | Reduce heat next time and pull earlier |
If you wait until the eggs look fully cooked, you’ve gone too far. Trust the process and pull them early. This timing is what makes perfect scrambled eggs every time.
My Foolproof Boiling Eggs Technique for Soft, Medium, and Hard Yolks
Boiling eggs was a challenge for me. I tried many times, but often got overcooked yolks. I even ruined some shells.
But then, I found a boiling eggs technique that worked. My breakfasts and snacks got better. I no longer had to guess.
Starting with Cold Water vs. Boiling Water
I always start my eggs in cold water. This makes them cook evenly.
Putting eggs in boiling water can crack them. It also cooks them unevenly, near the edges.
Starting with cold water lets eggs warm up slowly. This way, I get consistent results every time.
I place the eggs in a single layer at the bottom of the pot, cover them with about an inch of cold water, and bring everything to a boil together. It’s simple and works great.
Timing Charts for Every Yolk Style
Once the water boils, I turn off the heat. Then, I cover the pot and wait. The timing is key for the yolk’s texture.
I have a chart in my kitchen. It helps me every time.
| Yolk Style | Resting Time (Covered, Off Heat) | Yolk Texture |
|---|---|---|
| Soft-Boiled | 4 to 6 minutes | Runny, jammy center |
| Medium-Boiled | 7 to 9 minutes | Slightly firm, creamy middle |
| Hard-Boiled | 10 to 12 minutes | Fully set, no gray ring |
I use large eggs straight from the fridge. If your eggs are room temperature, subtract a minute to avoid overcooking.
The Ice Bath Trick for Easy Peeling
This step is non-negotiable for me. After the timer goes off, I put the eggs in ice water.
The ice bath stops the cooking right away. Without it, the yolk might get overcooked.
This trick also makes peeling easier. The rapid cooling helps separate the egg from the shell.
“The fastest way to ruin a good boiled egg is skipping the ice bath and letting carryover heat take over.”
I let my eggs sit in ice water for at least five minutes before peeling. This short wait helps avoid shredded whites and makes peeling easier.
Getting Fried Eggs Temperature Right: Sunny-Side Up, Over Easy, and More
My fried eggs used to be either too soggy or too crispy. The secret was controlling fried eggs temperature from the start.
Once I got the heat right, every egg turned out perfect. Here’s how I do it every time.
Step 1: Preheating the Pan Correctly
I heat my pan on medium-low before adding butter or oil. Rushing this step can make the edges burnt and the center runny.
To check if the pan is ready, I drop a few water drops into it. If they evaporate quickly, the pan is ready. If they disappear too fast, I turn off the heat for a minute.
Being patient here is key. A well-heated pan cooks the egg white gently, avoiding toughness.
Step 2: Sunny-Side Up vs Over Easy vs Over Hard
After the pan and fat are ready, I crack the egg in gently and lower the heat. Each style has its own timing and flipping rules.
- Sunny-side up: I never flip this one. Instead, I cover the pan for the last minute so trapped steam finishes cooking the top of the white while the yolk stays completely runny.
- Over easy: I flip it once, quickly, and cook the second side for just 15 to 20 seconds. This keeps the yolk soft and warm in the middle.
- Over hard: I flip it the same way but let it cook for a full minute or two, until the yolk firms up all the way through.
My favorite is over easy. It gives me that rich, flowing yolk without any risk of an undercooked white on top.
| Style | Flip Required | Time After Flip | Yolk Texture |
|---|---|---|---|
| Sunny-Side Up | No | Covered, 1 minute | Fully runny |
| Over Easy | Yes | 15–20 seconds | Soft, warm center |
| Over Hard | Yes | 1–2 minutes | Fully set |
Signs Your Fried Egg Is Done
I watch the edges of the white closely as it cooks. Once they shift from glossy and clear to opaque and matte, the egg is ready to come off the heat.
The center of the white should look set but slightly soft. If I press the yolk gently with a spatula and it feels firm on the outside while giving a little underneath, I know it’s exactly where I want it.
“An egg is always an adventure; the next one may be different.”
— Oscar Wilde
That’s why I check every fried egg by sight and feel instead of trusting a fixed timer. Getting fried eggs temperature right isn’t about memorizing minutes—it’s about reading what’s happening in the pan.
Fluffy Omelet Tips That Transformed My Breakfast Game
For years, my omelets were flat and tough. I thought it was my pan, stove, or eggs. But then, I learned some fluffy omelet tips from experts. Everything changed after that.
Now, my omelets puff up and fold like they’re from a brunch spot. It took a lot of practice, but it was worth it.
The Secret to an Airy Egg Mixture
Whisking is key. I don’t just stir my eggs; I beat them until they’re smooth.
Whisking hard adds air bubbles. These bubbles make the omelet light when it cooks.
I tried water and milk in my eggs. Milk made them dense. But a little cold water makes them fluffy.
Folding Techniques for a Restaurant-Style Finish
Timing is everything when cooking eggs. I keep the heat low and let the edges set before touching it.
Here’s how to fold for a neat look:
- Pour eggs into a preheated, buttered pan and let them sit for about 20 seconds.
- Push the cooked edges toward the center with a spatula, tilting the pan to fill gaps with raw egg.
- Add fillings to one half when the top is almost set.
- Fold the empty half over the filled side with a quick wrist motion.
- Slide the omelet onto a plate, seam side down, for a neat finish.
I tried different folds to find the best for home cooking.
| Fold Style | Technique | Best For |
|---|---|---|
| French Fold | Rolled into a smooth log using a spatula and pan tilt | Silky, minimal-filling omelets |
| American Tri-Fold | Folded into thirds like a letter | Cheesy or veggie-loaded omelets |
| Diner Half-Fold | Simple fold in half over fillings | Quick weekday breakfasts |
I prefer the tri-fold for its ability to hold fillings. Moving the pan gently and folding confidently makes a big difference.
These small, deliberate moves are the real fluffy omelet tips that made my breakfast better.
How I Poach Eggs Without Any Guesswork
When I stopped fearing poached eggs, my weekend breakfasts got fancier. I thought poaching needed chef training, but it’s just about the right water and a swirl. Now, poached eggs make my mornings special.
My first tries were tough. My egg whites spread out like wisps. But after a few tries, I got it right. I never guessed again.
Step 1: Creating the Perfect Poaching Water
Great poached eggs start before the egg hits the water. I fill a medium saucepan with three inches of water. This lets the egg float without crowding.
I heat the water gently, not boiling. Too much heat messes up the eggs, causing them to break apart.
I add a tablespoon of white vinegar to the water. This helps the egg whites set faster, keeping them together. Skipping this step can make a big difference, I’ve found.
- Use a wide, shallow saucepan for easier egg placement
- Keep the water at a gentle simmer, not a hard boil
- Add one tablespoon of white vinegar per quart of water
- Crack each egg into a small bowl or ramekin before adding it to the pot
Step 2: The Swirl Method for Neat Poached Eggs
This trick fixed my stringy egg problem. Before adding the egg, I stir the water to make a whirlpool. This helps the egg white wrap around the yolk.
I slide the egg into the center of the swirl. Let it cook for about three minutes. The yolk stays soft, and the white sets neatly.
Mastering this swirl made poaching eggs reliable. It made me feel like a pro chef in my kitchen.
Common Egg Cooking Mistakes I See Most Often (And How to Fix Them)
Ever wondered why your eggs never turn out right? You might be making one of these four common mistakes. I made all of them before I learned what was wrong.
But don’t worry, each mistake has a simple fix. Let me share what I’ve learned from years of trying, failing, and overcooking breakfasts.
Mistake 1: Cooking on Heat That’s Too High
This mistake is very common. High heat seems faster, and who likes waiting for eggs?
But high heat makes eggs tough and rubbery fast. The proteins tighten too quickly, squeezing out moisture. This leaves you with dry, chewy eggs.
The fix is simple: use medium-low or even low heat. It takes a bit longer, but your eggs will be soft, creamy, and worth waiting for.
Mistake 2: Skipping the Resting Time
It’s tempting to serve eggs as soon as they look done. But residual heat keeps cooking them even after the pan is off the burner.
Scrambled eggs need about thirty seconds off the heat to set right. Fried eggs also need a brief rest. This lets the whites firm up and the yolk stay runny.
Skipping this step is a common mistake. Just give your eggs a moment before serving.
Mistake 3: Using Old or Improperly Stored Eggs
Fresh eggs taste better and cook differently. Old eggs can taste flat and cook unpredictably.
I always check eggs with a float test before cooking. Fill a bowl with cold water, drop the egg in, and watch what happens.
| Float Test Result | Approximate Egg Age | What It Means |
|---|---|---|
| Sinks and lies flat on its side | 1 to 2 weeks old | Very fresh; ideal for poaching and frying |
| Sinks but stands upright | 2 to 3 weeks old | Stil good; great for scrambling and boiling |
| Floats to the top | 4 or more weeks old | Discard; the egg has likely gone bad |
Storing eggs properly is key. Keep them in the coldest part of your fridge, not the door.
Mistake 4: Overcrowding the Pan
Overcrowding the pan is a common mistake, even when cooking for a crowd. It seems efficient, but it’s not.
Overcrowding lowers the pan’s temperature and traps steam. This makes your eggs steam instead of frying or scrambling. You get pale, soggy eggs instead of golden, flavorful ones.
My rule of thumb: give each egg enough room to breathe. Usually, no more than two or three per skillet. If you’re cooking for many, cook in batches or use a second pan.
How to Avoid Rubbery Eggs and Other Texture Problems
Ever wondered why eggs can turn tough and bouncy? You’re not alone. I get lots of messages about this, and I get it.
Understanding what happens in the pan can help you avoid rubbery eggs. Let’s look at the science and then some quick fixes.
Understanding Why Eggs Turn Rubbery
Eggs are mostly protein and water. Heat changes both. When cooked gently, proteins link up and trap moisture, making eggs soft and custardy.
But, if you cook eggs too fast or for too long, proteins tighten up. They push out moisture, making eggs dry and rubbery.
“Overcooked eggs aren’t really ‘burnt’—they’re proteins that have simply been given nowhere for their moisture to go.”
This is why low, patient heat is key in all egg cooking methods. High heat causes rubbery texture, no matter the method.
| Texture Problem | Likely Cause | Best Fix |
|---|---|---|
| Rubbery scrambled eggs | Heat too high, cooked too long | Lower heat, remove from pan early |
| Tough fried egg edges | Pan preheated too hot | Reduce heat, use more fat |
| Chalky, gray-ringed boiled yolks | Overboiling, no ice bath | Shorten boil time, chill immediately |
| Dense, flat omelet | Overcooked before folding | Pull off heat while slightly wet |
Quick Fixes for Overcooked Eggs
Even after years, I sometimes overcook eggs. It happens to everyone. Don’t worry if it happens to you too.
Here are tricks to rescue overcooked eggs or avoid them next time:
- Add a splash of cream or milk to scrambled eggs when they start to tighten. It softens them instantly.
- Pull the pan off the heat when eggs look slightly underdone. Carryover heat will finish cooking them.
- Switch to medium-low heat from the start for scrambled or omelet-style eggs.
- Use a nonstick pan to avoid needing high heat to prevent sticking.
- Set a timer for boiled eggs to avoid overcooking them.
These fixes are simple but effective. Small changes can make a big difference. They help you avoid rubbery eggs and enjoy a soft, tender bite every time.
Conclusion: Your Path to Cooking Eggs with Confidence
Learning to cook eggs perfectly is simple. Just watch your heat, time each step, and practice. I didn’t get it right away, and you don’t have to either.
Whether you’re making soft scrambled eggs or perfect poached eggs, practice makes perfect. Choose a method you love and try it tomorrow. Maybe you’ll master over-easy eggs or a perfect omelet.
Even pros mess up sometimes. A pan might get too hot, or you might forget the timer. But don’t give up. Keep trying and adjust as you learn.
Eggs are easy to work with once you know the basics. They’re also affordable for experimenting. So, grab a carton, heat up your pan, and try something new. Your next breakfast could be amazing.
FAQ
What’s the biggest secret to cooking eggs perfectly every time?
The secret is egg cooking temperatures. Low and steady heat makes eggs silky, not rubbery. Respect the stove dial for better results.
How do I make perfect scrambled eggs without them turning gray or watery?
Whisk eggs well, season before cooking, and use low heat. Stir constantly and remove from heat when eggs are almost done. They’ll cook more from the heat left.
What’s your favorite boiling eggs technique for easy peeling?
Start with room temperature eggs and gentle water. Use an ice bath after cooking. It stops overcooking and makes peeling easy.
How do I get fried eggs temperature just right so the yolk doesn’t turn hard?
Use a preheated pan, not a hot one. Test with water; if it sizzles gently, it’s ready. Medium-low heat keeps the yolk soft.
What are some quick cooking tips for beginners who feel intimidated by eggs?
Slow down, use nonstick pans, and stay with the stove. Eggs cook fast, so adjust heat as needed.
What are the most common egg cooking mistakes you see people make?
Mistakes include high heat, skipping resting time, using old eggs, and overcrowding. These lead to bad texture. Fixing them is easy once you know.
How do I avoid rubbery eggs once and for all?
Use gentle, low heat and don’t let eggs sit in hot pans. A splash of cream can soften overcooked eggs. Prevention is key.
Do you have any fluffy omelet tips for a restaurant-style finish at home?
Whisk eggs well to add air, and fold gently. Fold when eggs are almost set but glossy. This gives a professional look.
Are there different egg preparation methods I should know depending on the meal?
Yes, each method like scrambling, boiling, and frying needs different heat and timing. Knowing these basics makes cooking eggs easy.
How do I know if my eggs are fresh enough to cook with?
Use the float test. Fresh eggs sink flat, old ones stand or float. Store eggs in the fridge, not the door, to keep them fresh.